| 在大陸的某攝影網站上有個討論問公司要拍筆筒般大小產品的細節,只有5千元預算,還要兼顧拍會議等場面,可以用什麼鏡頭? 有人說該用微距鏡,有人說該用移軸鏡,有人說什麼鏡都不是問題,一定要有閃燈,真是意見紛云。 | There is a discussion in a Mainland China photographic forum on the choice of lens for taking the details of product of the size of pen holder but the budget is limited to 5k. What makes it even harder to make the decision is that the lens should be used in event photography too. Some suggest macro lens, some said PC lens is a must and some insist lens is not a problem but an external flash is a must. |
 | |
| 對於選用微距鏡的人來說,質素是他們的首要考慮,因為要拍出好片子,鏡頭要有足夠的銳利程度,片子中心跟周邊的效果不可以相差太大,這些正正是微距鏡的強項。可惜,微距鏡也不是太平的,舊款的60mm micro 2.6k,新款的60mm micro G鏡就6k,105 VR也超預算,所以,微距的選擇似乎不可能。 | For the choice of macro lens, quality is the keyword. If we need a picture with sharpness at all part of the picture, there is no other choice than using a macro lens. However, it is expensive to buy a macro lens. The old model 60mm micro is selling at 2.6k while the new model is over 6k. The 105 VR is also over budget. Thus, it seems not possible to use macro lens in this case. |
 | |
| 提議用移軸鏡的,當然是考慮到景深控制的問題,在有限景深下,用移軸鏡可以選擇最有效的焦平面,可惜,移軸鏡價值不菲,5k只可以買半支舊款的移軸鏡。 | PC lens would give a very good control in the using of the limited DOF. However, PC lenses are very expensive. Even for the old model, 5k can only purchase half a lens, if they willing to cut it for you. |
 | |
我卻偏向相信有兩個解決方案:
| To me, I believe there are two solutions.
|
 | |
| 我的選擇其實是基於景深的考量,由於拍攝的距離短,景深十分有限,所以要盡量令組合可以給出最大的景深。 為了了解當中的情況,我們要看一下光學中的一些事實。 在物理裡,有兩公式綜合了我們的討論。 (1) 透鏡公式 : 1/f = 1/u + 1/v (2) 放大率 : m = v/u 利用這兩條公式可以知道,若要利用55mm鏡頭拍攝1:1的圖片,物距是110mm,將這個資料放入計算dof的工具,發覺在f22光圈時景深有0.27cm,對大致沿焦平面放置的產品大概可以了;但若果只有f5.6光圈,則景深變為0.07cm,這對一般的拍攝變為不可能了。當然,不需要1:1的放大率時景深會寛容許多,不過重點是要用細光圈,所以閃燈不可少,這正是第一個方案的原因。﹝注意,上面雖然用了55mm鏡頭舉例,但在相同機器下,相同放大率時,焦距不影響結果。﹞ | My choice of solution is based on the fact that when shooting close to the product, the depth of field (dof) is very limited. In order to make the mission done, even not to the best quality, we need to obtain the greatest dof. Let us look at some facts in optics. The basic physics in this problem is summarized by two equations: (1) Lens formula : 1/f = 1/u + 1/v (2) Magnification : m = v/u Let us use an 55mm lens as an example (but the result is the same when other focal lengths are used as long as the camera does not change). To have a magnification 1:1, the above two equations give the object distance v to be 110mm. Put these data into a dof calculator, we found that at f22 the dof is 0.27cm while it reduces dramatically to 0.07 at f5.6. Thus you can see f22 seems necessary for any practical shooting at this magnification. Of course, when the magnification reduced, the dof will be greater for you to work with. But the truth of using small aperture still applies. Thus, this justifies to have an external flash in the system is a must. |
 | |
| 除了可以利用細光圈獲得大景深外,亦可以用細感光元件來達至。以G9為例,若要拍出像本文第二幅照片的效果,在F8光圈時﹝G9的最細光圈﹞景深為5cm左右,但若用DSLR在f22時拍,景深也只有1cm左右,因此,我們可以見到DC在產品拍攝的優勢,當然,細感光元件也有缺點,就是雜訊高質量低。所以,在只需在網上發表作品的情況下,DC是一個好的選擇。 | Besides using small aperture, we can use small sensor to obtain great dof. When a DC like G9 is used, to create a picture like the second picture in this blog, the dof is about 5cm at F8 (the smallest aperture can be used) while it is only about 1 cm when using DSLR when f22 is applied. You can easily see the advantage of using a DC in product shooting. Of course, the quality of the picture would not be as high as the camera with large sensor. Thus, this solution is good only when we need to put our pictures in the internet only. |
| I know lots of people studying physics also like photography. May be it is because we have another understanding of it from the very fundamental way. 我認識許多讀物理的人也是攝影的愛好者,或許這是因為我們讀物理的人對攝影根本就存在著一些十分另類的基礎認知。 | |
2008年12月10日 星期三
拍產品的討論 A discussion on product photography

2008年12月9日 星期二
抽水EE新武器
抽水EE之所以抽水功力莫測高深,主要是她的武器層出不窮,最近,她又加入新武器,為了揭穿她的底牌,我帶大家睇下這個最新武器:
武器在電腦展最後一天買入,不過不是在展場,因為展場太多人,就算有平野買都未到我地買,不過同一時間,好多其他地方都話配合電腦展平賣,所以,趁佢平幾平元賣入。
 為左保留神秘感,要click入去先可以睇大相。下同
究竟係乜東東?原來是一部方便隨身的電腦﹝用mouse highlight前面你見唔到的空位就會見到我寫乜﹞,平日抽水,點解狗地會比你抽呢?一定有多少秘笈,除左小食,愛心,當然要有美好的回憶,相機少不了,但影左相大家都未必睇到,所以要靠佢。

依個電腦最大特點係平之外舊電會耐用好多,又方便帶出帶入,去到邊都用得到。可惜功能就唔會太強,但都可以有線及無線上網,影左相,用埋佢,就可以好方便比大家睇了。
其實佢都幾靚仔,香檳色外殼,仲話是耐磿,續航能力高,充一次電可以用五六個小時。不過CPU就雞D,工作會慢,但係display獨立,估計用來玩電玩都OK。
下面張相大概都影到佢的介紹

介紹完抽水EE新武器之後,我想公開埋今次這篇blog用到的秘技。第一是細相click 入去開大相,第二是隱形文字的做法。
細相click 入去開大相
武器在電腦展最後一天買入,不過不是在展場,因為展場太多人,就算有平野買都未到我地買,不過同一時間,好多其他地方都話配合電腦展平賣,所以,趁佢平幾平元賣入。
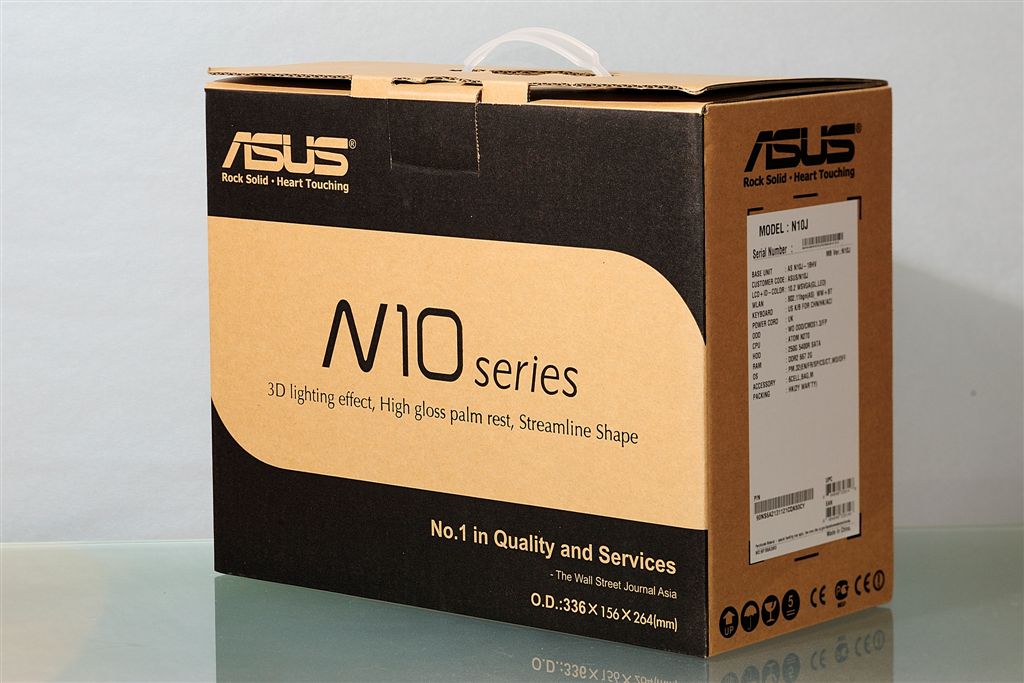
究竟係乜東東?原來是一部方便隨身的電腦﹝用mouse highlight前面你見唔到的空位就會見到我寫乜﹞,平日抽水,點解狗地會比你抽呢?一定有多少秘笈,除左小食,愛心,當然要有美好的回憶,相機少不了,但影左相大家都未必睇到,所以要靠佢。
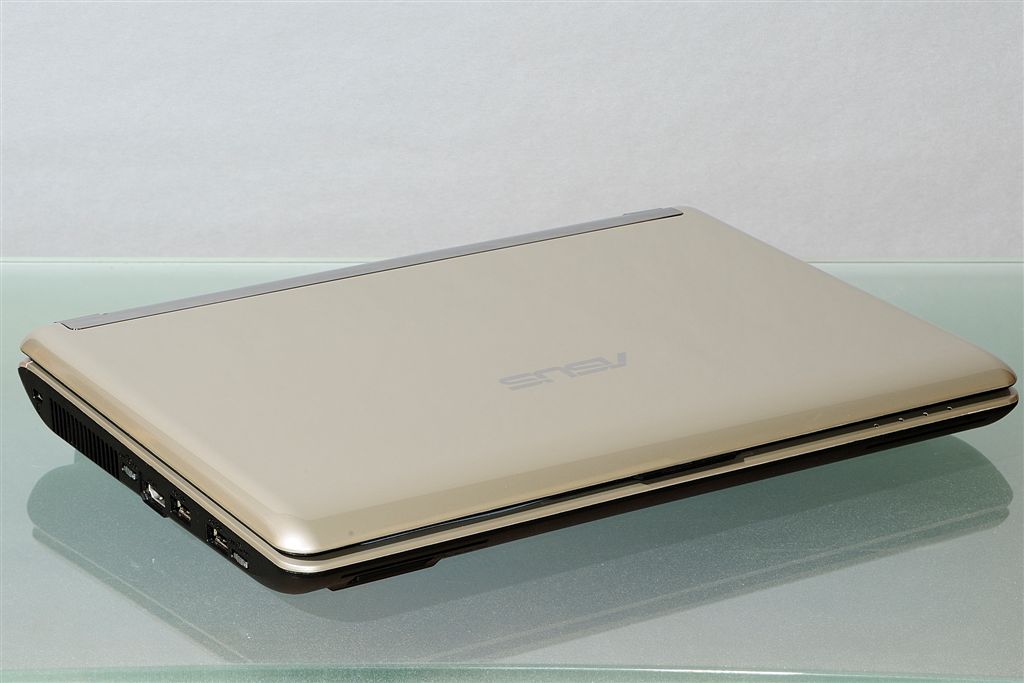
依個電腦最大特點係平之外舊電會耐用好多,又方便帶出帶入,去到邊都用得到。可惜功能就唔會太強,但都可以有線及無線上網,影左相,用埋佢,就可以好方便比大家睇了。
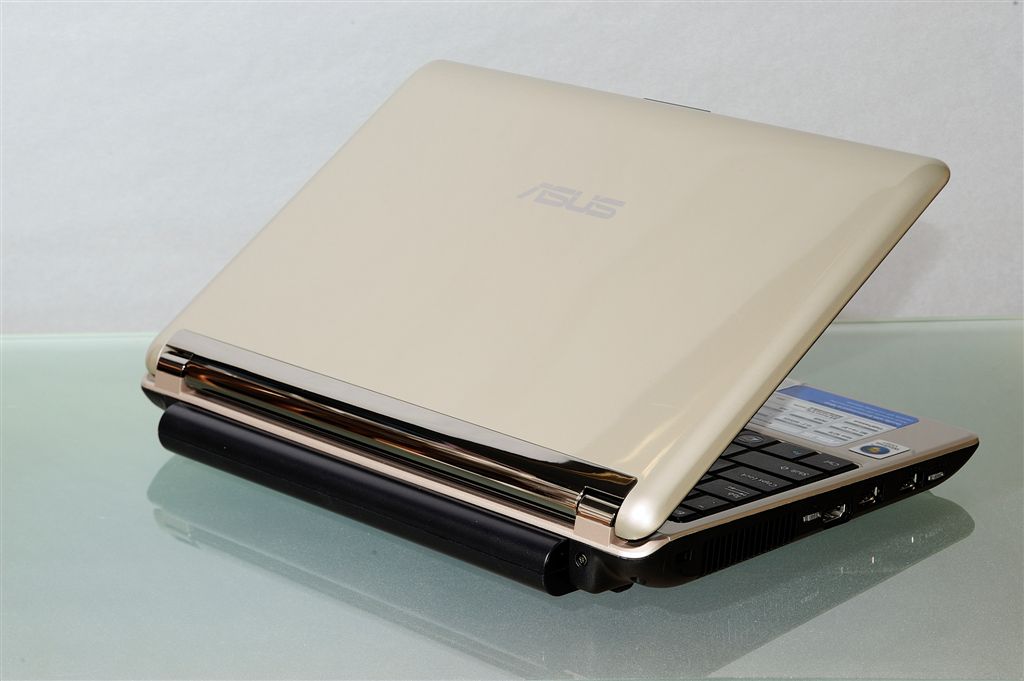
其實佢都幾靚仔,香檳色外殼,仲話是耐磿,續航能力高,充一次電可以用五六個小時。不過CPU就雞D,工作會慢,但係display獨立,估計用來玩電玩都OK。
下面張相大概都影到佢的介紹
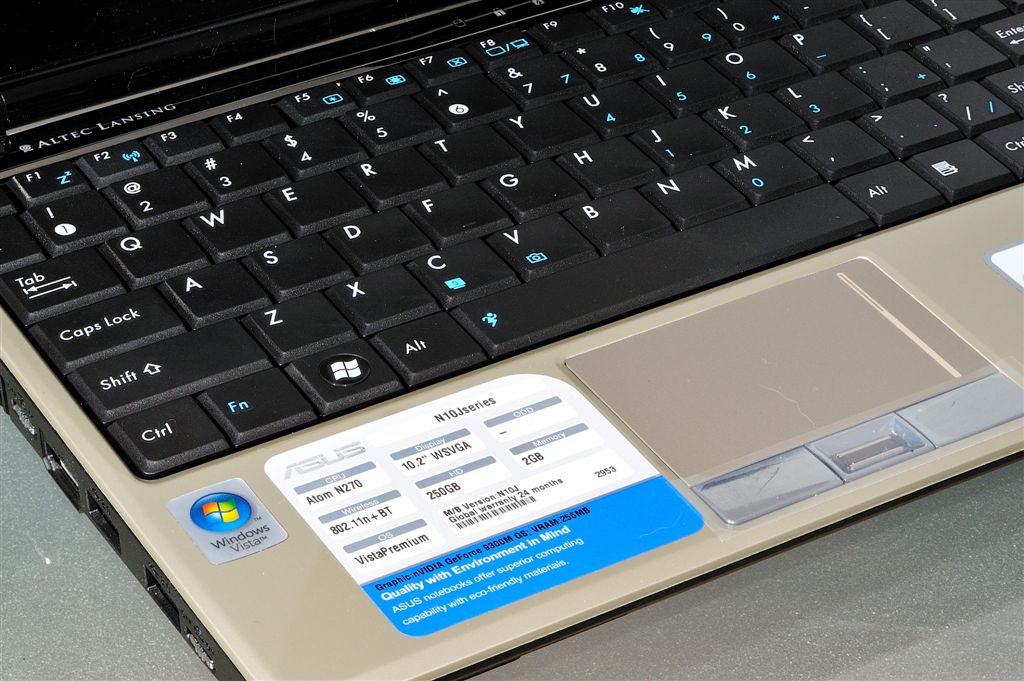
介紹完抽水EE新武器之後,我想公開埋今次這篇blog用到的秘技。第一是細相click 入去開大相,第二是隱形文字的做法。
細相click 入去開大相
- 放入你要的相並highlight張相
- 用mouse拉細張相到100點闊度左右﹝當然可以更細﹞
- 如張相未highlight,再highlight返佢
- click版面上端internet link的icon,此時link text為灰色[image],這是正確的,在link URL一項上把相片的網址copy入去
- click OK
- 先輸入要隱形的文字
- highlight該組文字
- 在版面上端Text Color的icon中選白色﹝亦可以是任何一色,只要與第4步相同即可﹞
- 在版面上端的Highlight Color的icon中亦選白色,由於文字與底色相同,文字被隱藏起來。
- 要觀看該組文字,只要用mouse把它們highlight即可以。所以記得提醒你的讀者這點。
2008年12月7日 星期日
Photographic Talk
| I met a friend a couple days ago on a dog gathering and we have shared, briefly, our opinion in photography. Photography when considered as a kind of creative work can't have a fixed way of doing it. And is this nature of it that makes camera and lens different from merely a recording machine. | 幾天前在一個狗狗的聚會上跟一位狗友分享了一點點攝影的感受,感覺上攝影是一種創作,因而各人有自己的處理方法,所以,相機和鏡頭不止是一種記錄的工具。 |
| Fig 1 : 70-200 F4 IS 圖一:小小白 70-200 F4 IS  | |
| My friend has recently purchased her "little little white" 70-200 F4 IS L lens for her Canon machine. She said the price for this lens is nearly the same as its big brother F2.8 "little white" lens. Her choice between them based on the weight of the lens. F2.8 lens is too heavy for her and as F4 has IS which can keep the safe shutter speed 4 stops down for her to take photos at dim light with hand held camera, her decision goes to F4 lens. | 朋友最近買了她的小小白,是用在她Canon相機上的紅圈白鏡70-200 F4 IS L鏡頭,據朋友說,這鏡頭因為有IS的關係,售價跟它的大佬F2.8的小白相差不遠,而她選用小小白而不用小白的原因,是因為F2.8的小白對她而言太重了,加上小小白有防抖IS可以讓她在暗光下手持拍攝時減四級快門,所以她別無選擇。 |
| Fig 2 : 70-200 F2.8 圖二:小白 F2.8  | |
| This sounds reasonable and base on my experience in using this lens in a studio, I agree that its outcome is extraordinary. But for me, I would opt the F2.8 brother rather. I make this decision base on two things. One is that IS can't replace large aperture lens. IS can just keep the safe shutter speed lower but not make the lens faster. When I need to take photos of my energetic dog at dim light, I need a faster lens to freeze his motion. This traditional wisdom may not hold nowadays with the out spring of high ISO machines, but, the basic difference between fast lens vs anti-vibration design still applies. The second reason is that faster lens gives shallower dof with beautiful bokeh. A photographer can't just ignore the unimportant things as a painter does. To keep us looking at the important part of a photo, photographers may blur out the unimportant part. This comes the choice of dof. The blurred part, bokeh as they called it, reveals the design of the lens. Although a fast lens may not give beautiful bokeh, a slow lens can never give good looking bokeh, or just can't give bokeh. Thus, irrespective of the difficulties and the heavenly cost in making large aperture lens, people are still making this kind of lens. When I need to pay for the lens, I think the optical thing (such as large aperture) worths while the electronic things (like anti-vibration system) are not. The cost of making electronic things is low tho the developing cost is high. This makes its price tag drop easily. However, the cost of producing optical lenses can hardly cut and thus their corresponding products can hardly reduce their price. | 這也頗有道理,並且我在影樓用這小小白的經驗告訴我它的表現也十分突出,朋友的選擇自有她的基礎。但若果可以讓我作選擇的話,我還是會選用F2.8的小白,原因有兩點: 第一是防抖不可以替代大光圈快鏡;不錯,小小白的IS可以讓我們減4級快門,可是這不能曝光時間減少。考慮到若我要在暗光處拍我坐不定的狗狗,我想我要一支快鏡來凝固我的狗狗的動作;當然,上面的傳統觀念也是要與時並進的,有了高ISO的機器,我們已經可以利用高ISO來推高快門速度了,未必要選用大光圈鏡頭。 第二個選擇小白的原因,是因為攝影時我們要選擇景深來強調主體,而景深以外的散景美麗與否,就是取決於鏡頭的設計。雖然大光圈鏡頭不一出完美的散景,細光圈鏡頭就一定做不出好的散景,甚至乎不會做出散景效果。基於這點,就算製造大光圈鏡頭有一定難度及成本趨於天價,我們仍在追求大光圈鏡頭呢。對我來說,要付出金錢去買一支鏡,我會願意把錢花在光學而非電子部份,電子部份的開發雖然也是天價,但製作費輕,降價的可能非常高,相反,光學的製作抗跌能力非常高,所以大光圈的鏡保值能力較好,高價是合理的。 |
| Fig 3 : The bokeh by Nikkor 135mm DC at f2.8 圖三:用135mm DC 在 f2.8下做出的散景  | |
| Another point we have talked about is whether to save pictures at raw or jpg. To reduce the post-photograph workload, jpg is the only choice. However, as the degree of retouching a jpg picture is limited, we need to be very careful in selecting the picture style in the camera. To people like me who cannot do this professionally it is better to use raw files instead. Raw files eat away my storage but is more safe as I can do lots of adjustment when I back to my home. The following pictures show the different picture I can easily produce at home. | 另一個觸及的問題是該影jpg或是raw檔,由於jpg檔後製的能力有限,所以在拍攝時要做好相機的設定,對於像我這此在這方面能力有限的人,還是拍攝raw檔比較保險,當然,raw檔的體積較大,消耗記憶體較多,好處是保留了最多的原始資料,要怎樣的相片,可以回家才調出來。 下面的一組相片,正正是我把一張raw的原始相片用不同的調教出來的不同的效果: |
| Fig 4 : Results of different retocuhing by NX2 圖四:利用NX2把RAW檔調成不同的效果  a : original picture/原圖 | |
 b : white balance set/調好白平衡 |  c : effect at neutral/效果設為neutral |
 d : effect at normal/效果設為normal |  e: effect at vivic/效果設為vivic |
 f : photo style at protrait/人像模式 |  g : photo style at landscape/風景模式 |
 h : sharp/銳化 |  i : D-lighting: off/動態補光 : off |
 j : D-lighting : normal/動態補光:normal |  k : D-lighting: super high/動態補光 : super high |
 l : -0.5eV |  m : curve in S shape/S曲線 |
| You can see there are lots of possibilities and you should bear in mind that there is no correct or incorrect in this retouching but only a choice of taste. Of all, white balance affect the most and is the one I would definitely check before export as jpg files. The following picture is the one I choose for this baby, but is not based on this picture but the whole lot of pictures I took that day by a batch process. You can see that it is not that good but is acceptable. | 看了這麼多個例子,你會發覺根本沒有對錯的問題,只是個人口味而已。其實,眾多個修改當中,以白平衡的修正最為重要,我一般會先教正白平衡才轉為jpg檔。 下圖是為這相片後製的選擇,但我並非專為這相片做的個別微調,只是把當日的照片統一地用批次過程一次過調整過來,這樣做雖然不是最合適,但仍給出可以接受的效果。 |
| Fig 5 : My choice of the retouch 圖五:我選用的微調  honey, you're so cute | |
2008年12月4日 星期四
大露營
這兩天同仔仔豬豬去左『大』露營,係乜都大的露營。
第一,係開架大車去,咁豬豬同仔仔就可以坐得舒舒服服

﹝停車塲上遠處幾架大車中最細果架就係,所謂最大,原來同大車比好細架。﹞
第二,個營地好『大』,個牌仲大,不過真係可以搭營的地方就大到只可以容得下兩個營。

﹝原本諗住個營地細細地我地用左會冇人來,可以清清靜靜,點知七時未夠有班老人家來BBQ,諗住避開一陣,出去行個圈,點知返來時來了一班中學旅行的學生,香港真係冇靜土。﹞
第三,用個好大的營,仔仔豬豬同ocoy都可以相安無事,勉強可以企身換褲。

﹝雖然話好大個營,但比起最近用開的兩個營──一個在加拿大借契爺的六角營及另一個只係用左一次就捐左去四川地震的中國出口到美國轉返香港再返去中國的大營,今次這個營對兩人兩狗來說只是中型而已。﹞
第四,有個好大的shelter

﹝個shelter有10呎濶20呎長,用來霸位唔好比人在自己個營周圍起營真係一流,不過,好重,應該唔會有人帶去行營。﹞
第五,有張好大的床

﹝如果多一張就好了,雖然重,但方便,開床不用15秒。﹞
第六,見到好大個天

﹝上到香港最高的山當然可以見到好大個天,不過都要天氣好先有好感覺。﹞
第七,有好大塊草地

﹝如果遊人唔多,狗狗可以開心的跑,這片草地跟Erindale Park的草地分別不大,惟一不同是這些草地沒有保養,沒有草地應有的感覺。﹞
第八,有好多大頭照


﹝地方夠大當然換支135mm影大頭,不過好大風,大頭相見到仔仔吹到耳仔都飛起。﹞
第九,大左人地間學校

﹝班細路又粗口又淫,食煙唔使本,隨地放垃圾,隨隊女老師唔覺有問題,惟有起左佢地個底再在其他老師巡場時大佢問佢是否xxxx中學老師,你D學生隨地放垃圾,唔想佢地走左D人以為我地留底,仲有好多煙頭,我地唔食煙嫁;結果死死地氣,個隨隊女miss自己清晒個場。﹞
第十,飲大左

﹝有朋自遠方來,當然要對酒當歌,唔好以為係飲水,係支高級名酒泥呀。﹞
第一,係開架大車去,咁豬豬同仔仔就可以坐得舒舒服服
﹝停車塲上遠處幾架大車中最細果架就係,所謂最大,原來同大車比好細架。﹞
第二,個營地好『大』,個牌仲大,不過真係可以搭營的地方就大到只可以容得下兩個營。
﹝原本諗住個營地細細地我地用左會冇人來,可以清清靜靜,點知七時未夠有班老人家來BBQ,諗住避開一陣,出去行個圈,點知返來時來了一班中學旅行的學生,香港真係冇靜土。﹞
第三,用個好大的營,仔仔豬豬同ocoy都可以相安無事,勉強可以企身換褲。
﹝雖然話好大個營,但比起最近用開的兩個營──一個在加拿大借契爺的六角營及另一個只係用左一次就捐左去四川地震的中國出口到美國轉返香港再返去中國的大營,今次這個營對兩人兩狗來說只是中型而已。﹞
第四,有個好大的shelter
﹝個shelter有10呎濶20呎長,用來霸位唔好比人在自己個營周圍起營真係一流,不過,好重,應該唔會有人帶去行營。﹞
第五,有張好大的床
﹝如果多一張就好了,雖然重,但方便,開床不用15秒。﹞
第六,見到好大個天
﹝上到香港最高的山當然可以見到好大個天,不過都要天氣好先有好感覺。﹞
第七,有好大塊草地
﹝如果遊人唔多,狗狗可以開心的跑,這片草地跟Erindale Park的草地分別不大,惟一不同是這些草地沒有保養,沒有草地應有的感覺。﹞
第八,有好多大頭照
﹝地方夠大當然換支135mm影大頭,不過好大風,大頭相見到仔仔吹到耳仔都飛起。﹞
第九,大左人地間學校
﹝班細路又粗口又淫,食煙唔使本,隨地放垃圾,隨隊女老師唔覺有問題,惟有起左佢地個底再在其他老師巡場時大佢問佢是否xxxx中學老師,你D學生隨地放垃圾,唔想佢地走左D人以為我地留底,仲有好多煙頭,我地唔食煙嫁;結果死死地氣,個隨隊女miss自己清晒個場。﹞
第十,飲大左
﹝有朋自遠方來,當然要對酒當歌,唔好以為係飲水,係支高級名酒泥呀。﹞
2008年12月1日 星期一
不為人道不人道
當大家好開心咁睇最近的生日會報導時,大家會以為我地狗地好開心,其實,箇過中有好多不為人道的不人道行為。
- 三人五狗一架千零cc車仔
唔好以為D大人好豪,party大大碟食物,人又有得食狗又有得食,其實佢地只係死要面子,平時慳得就慳,出鏡就豪,你地睇下,我地係點去參加依個party- 車尾廂裝晒禮物,唔會有空位,連睹後鏡都睇唔倒。
- 兩隻大狗,一個人,坐車仔車尾,已經好迫。
- 嘩,仲要加多隻呀
- 車頭呢,就除左坐司機同大人,仲要加佢
- 就係咁,一架細到唔可以再細的車,就載左3個大人同5隻大狗去party,仲要車埋幾十隻狗同幾十個人的禮物,你話幾唔人道。
- 車尾廂裝晒禮物,唔會有空位,連睹後鏡都睇唔倒。
- D大人好惡死,睇下D食物都比人斬
- 大耳妹妹好肚餓
- 我仔仔都好餓
- 其他小朋友又何嘗唔餓
- 但係大會指派左個豬肉榮泥保護D食物,我地狗地真係連想都唔敢想問佢地攞D野食。
- 大耳妹妹好肚餓
- 閂埋門打仔
- 話就話好錫我地,同我地做生日,唔生日都可以影生日相
- 當D人睇唔倒,就閂埋門打仔
- 話就話好錫我地,同我地做生日,唔生日都可以影生日相
- 表面風光,背後做牛做馬
- 表面上我地來這裡做主角,可以無拘無束的玩
- 背後,Ranger要做枕仔
- 『媽媽,你放過Ranger啦,我平日都要做枕仔,豬豬做被女,我泥代替Ranger比你枕啦。』
- 表面上我地來這裡做主角,可以無拘無束的玩
- 辛苦得泥仲要年中無休,佢地玩到日落先離開,難為我地狗地就真係好辛苦


訂閱:
文章 (Atom)